Features > Database
We've made scripts to help you set up your database quickly and automatically. The file can be found in the /supabase/migrations/ folder. This document explains how to run migrations and setup your Supabase project in under 5 minutes!
Prerequisites
Before you start, ensure you have the following::
- -> Begin by creating a new project on Supabase If you don't already have one.
- -> Make sure you have Node.js and npm installed, as they are necessary to install the Supabase CLI.
🗒️ Supabase CLI Docs
If you face any problems, you might want to refer to the Supabase CLI Docs
Setup
1. To begin, install the Supabase CLI. Open your terminal and execute the following command:
1npm install -g supabaseBy running this command, you will install the Supabase CLI globally on your machine, enabling you to use it from any location in your terminal.
2. Once the CLI is installed, you'll need to log in to your Supabase account:
1supabase loginFollow the instructions in your terminal to log in. This step ensures that your CLI can interact with your Supabase projects.
3. Go to the root directory of your repository where you've set up a Supabase project. If you haven't initialized one yet, you can do so by running:
1supabase init4. Once you've initialized your Supabase project and prepared your migration files, you can apply migrations to your database:
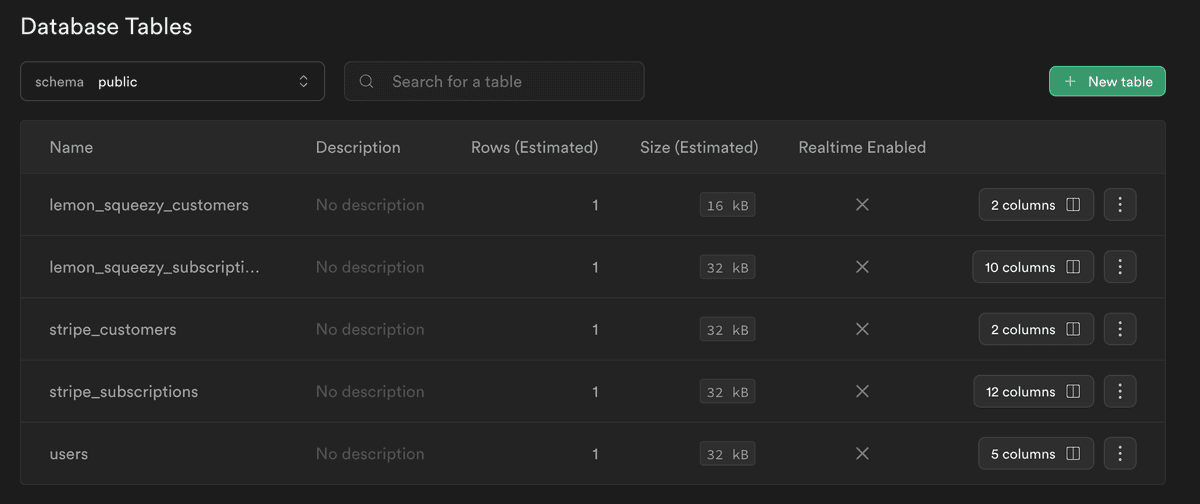
1supabase db push5. The following tables should be created in your Supabase project 🎉:
